
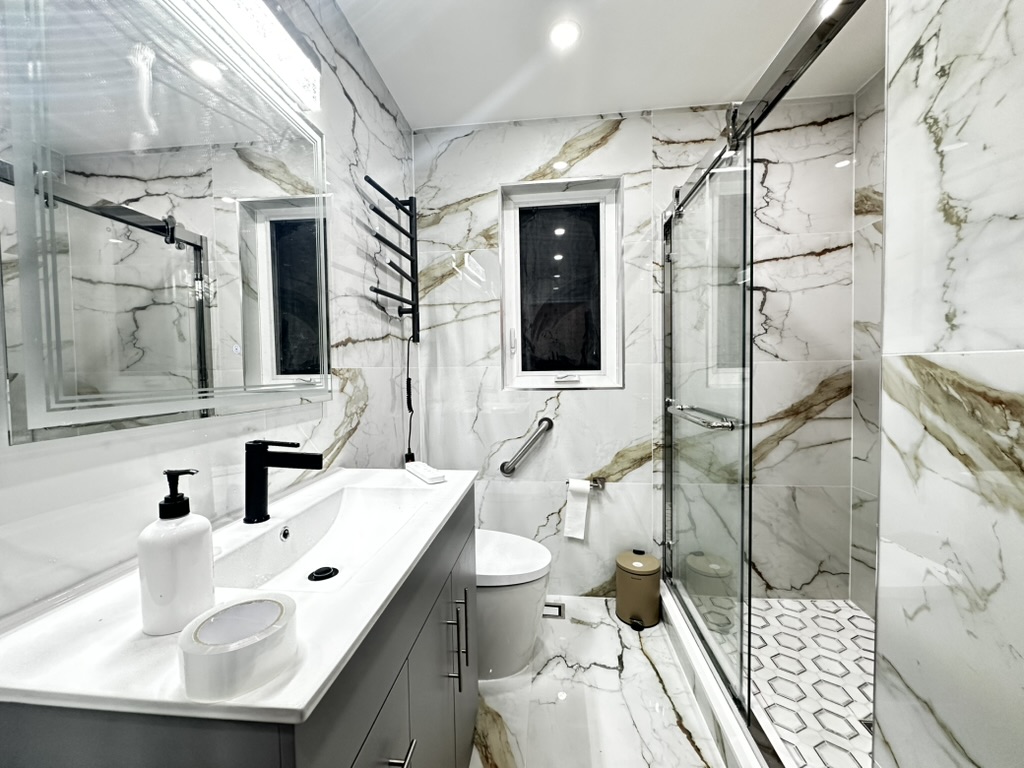
Bathroom Renovation Permit GTA (2026 Guide)
The Ultimate Guide to Bathroom Renovation Permits in the GTA (2026): Everything Ontario Homeowners Need to Know
Bathroom renovation permit GTA rules are one of the most important things homeowners must understand before starting a bathroom renovation in Toronto, Mississauga, Brampton, or anywhere in the Greater Toronto Area. Before you demolish the first tile or move a fixture, knowing when a permit is required can save you thousands of dollars, prevent legal issues, and protect your home’s value.
This isn’t just bureaucratic red tape; it’s the difference between a legally compliant, insured renovation that adds value to your home and a costly nightmare that could derail your sale, void your insurance, or result in expensive fines and demolition orders.
In this comprehensive guide, I’ll walk you through everything you need to know about bathroom renovation permits across the GTA, from when you need them to how much they cost, what inspections you’ll face, and the common mistakes that get homeowners in trouble.
Why Bathroom Renovation Permits Actually Matter (More Than You Think)
Let me share a scenario that plays out dozens of times every month across the GTA:
Sarah spent $28,000 renovating her Toronto bathroom in 2023. Beautiful walk-in shower, heated floors, and a custom vanity work. No permits. Fast forward to 2026: she’s selling her home. The buyer’s home inspector flags the unpermitted renovation. The buyer demands a $15,000 price reduction or walks away. Sarah has to either accept the loss, tear everything out and start over with permits (another $30,000+), or risk the deal falling through entirely.
This happens more often than you’d think. Here’s why permits genuinely matter:
1. Safety and Code Compliance
The Ontario Building Code isn’t arbitrary bureaucracy; it’s decades of lessons learned from water damage, electrical fires, structural failures, and mold disasters. Permits ensure:
*Proper drain slopes (preventing sewer gas backflow and standing water)
*Adequate waterproofing (the #1 cause of expensive bathroom failures)
*Correct electrical wiring (preventing fires and electrocution hazards)
*Proper ventilation (preventing mold growth and air quality issues)
*Structural integrity (ensuring heavy tubs don’t collapse through floors)
2. Home Value Protection
Unpermitted work is a massive red flag for buyers and lenders:
*Home inspectors routinely check for permits on renovations
*Buyers will demand price reductions of 50-100% of the renovation cost
*Some buyers will simply walk away from homes with unpermitted work
*Mortgage lenders may refuse to finance homes with code violations
*You may be forced to tear out completed work and start over
3. Insurance Coverage
Here is what most homeowners don’t know: your home insurance policy likely requires that major renovations comply with building codes. If your unpermitted bathroom renovation causes damage:
*Water damage from failed waterproofing? Claim denied.
*Electrical fire from DIY wiring? Claim denied.
*Mold from improper ventilation? Claim denied.
*You’ll be personally liable for tens of thousands of dollars in damages.
4. Legal Compliance
Building without required permits in Ontario is:
*A violation of the Building Code Act
*Punishable by stop-work orders
*Subject to fines up to $50,000 for individuals, $100,000 for corporations
*Grounds for orders to demolish completed work
*A potential barrier to future permits
5. Resale Disclosure Requirements
Under Ontario law, sellers must disclose known defects. If you knowingly sell a home with unpermitted work:
*You can be sued by buyers after closing
*You may be liable for correction costs
*You could face fraud charges in extreme cases
The $800-$2,000 you spend on permits is insurance against $20,000-$50,000+ in potential losses.
When You Absolutely MUST Get a Permit in the GTA
Let’s be crystal clear about when permits are mandatory. The Ontario Building Code and municipal bylaws require permits for any bathroom work involving:
 Moving or Relocating Plumbing Fixtures
You need a permit if:
-Moving your toilet to a different location (even 6 inches)
-Relocating your sink or vanity to a new wall
-Moving your shower or bathtub to a different spot
-Adding a second sink or toilet
-Converting a tub to a shower (or vice versa) in a new location
Why: Moving fixtures requires new drain lines, water supply lines, and proper venting. All of this must meet strict Ontario Plumbing Code requirements for:
-Drain line slopes (minimum 1/4″ per foot for drains, 1/8″ per foot for vents)
-Vent sizing and routing (improper venting causes sewer gas leaks and drainage problems)
-Water supply sizing (inadequate supply causes pressure problems)
-Fixture spacing (Ontario Code specifies minimum distances between fixtures)
Real example: Converting your traditional tub-shower combo into a curbless walk-in shower with a linear drain requires a permit, always. This is currently one of the most popular bathroom upgrades, and one of the most commonly done without permits.
Installing New Drains or Drainage Systems
You need a permit if:
-Adding a floor drain (common for walk-in showers)
-Installing new drainage lines
-Connecting to existing drains in new ways
-Rerouting existing drain lines
-Installing a sump pump or ejector pump for below-grade bathrooms
Why: Drainage is critical. Improper drainage causes:
- Water pooling and leaks
- Sewer gas infiltration (health hazard)
- Mold and rot in subfloors
- Foundation damage
Toronto-specific note: Toronto has particularly strict requirements for drainage, especially in older homes with combined sewer systems.
Structural Changes to Floors, Walls, or Ceilings
You need a permit if:
- Cutting or modifying floor joists (even small notches)
- Removing or altering load-bearing walls
- Lowering floors to accommodate new plumbing
- Reinforcing floors for heavy fixtures (large soaking tubs)
- Creating sunken tubs or raised platforms
- Opening up walls between rooms
- Modifying ceiling structures
Why: Structural changes affect your home’s safety. Improperly cut joists can lead to:
-Sagging floors
-Cracked walls and ceilings
-Catastrophic floor collapse
-Foundation settling
Critical note: You often need an engineer’s stamp for structural changes. This adds $800-$2,000 to your project cost but is non-negotiable for permit approval.
Adding or Modifying Electrical Systems
You need a permit if:
- Installing new electrical circuits
- Adding outlets or switches
- Installing heated floors (requires a dedicated circuit)
- Upgrading electrical panels
- Installing new light fixtures requires new wiring
- Adding GFCI protection where required
Important: Electrical permits come from the Electrical Safety Authority (ESA), not your municipality. But your building permit application will trigger ESA involvement.
Safety issue: Bathrooms are high-moisture environments. Ontario Electrical Code requires:
-GFCI protection on all receptacles
-Specific clearances from water sources
-Proper vapor barriers around electrical boxes
-Dedicated circuits for high-draw items (heated floors, jetted tubs)
Installing Heated Floors or Radiant Heating
You need a permit if:
- Installing electric in-floor heating
- Installing hydronic (water-based) radiant systems
- Adding heating elements to walls or ceilings
Why: Heated floors require:
-Electrical permits (for electric systems)
-Proper installation over waterproof membranes
-Dedicated electrical circuits (typically 15-20 amps)
-Proper insulation underneath (to prevent heat loss)
-Compliance with spacing requirements for crack prevention
Mississauga note: Mississauga has been particularly vigilant about heated floor installations and waterproofing compliance.
Adding or Modifying Ventilation Systems
You need a permit if:
- Installing a new exhaust fan where one didn’t exist
- Running new ductwork to the exterior
- Upgrading to a higher-CFM fan that requires new ducting
- Installing Heat Recovery Ventilators (HRVs) or Energy Recovery Ventilators (ERVs)
Why: Proper bathroom ventilation is crucial for:
-Moisture control (preventing mold)
-Air quality
-Building envelope protection
Ontario Building Code requirement: Bathrooms require a minimum 50 CFM exhaust capacity, ducted directly to the exterior (no venting to attics or soffits).
Major Waterproofing Installations
You need a permit if:
- Installing new shower enclosures with tile or stone
- Building custom shower pans
- Installing waterproof membranes in wet areas
- Creating curbless or barrier-free showers
Why: This is where Toronto and many GTA municipalities get extremely strict. Waterproofing failures are the most expensive bathroom disasters:
*Average water damage claim: $10,000-$30,000
*Mold remediation: $5,000-$15,000+
*Structural repair: $15,000-$50,000+
Toronto, Mississauga, and Vaughan specifically require waterproofing inspections before you close walls or install tile.
When You Can Skip the Permit (And Save Time and Money)
Not every bathroom project requires municipal approval. Here’s when you’re in the clear:
Replacing Fixtures in Exact Same Locations
No permit needed for:
- Swapping your toilet for a new model (same location, same rough-in)
- Replacing your vanity and sink (same plumbing connections)
- Installing a new bathtub in the existing spot (same drain location)
- Replacing shower valves and trim (no changes to rough plumbing)
- Updating faucets and hardware
Key requirement: The plumbing rough-in must stay exactly the same. You’re only changing the visible fixtures, not touching any pipes behind walls or under floors.
Cosmetic Updates and Finishes
No permit needed for:
- Painting walls and ceilings
- Installing new tile over existing surfaces (without waterproofing changes)
- Replacing cabinet hardware
- Updating mirrors
- Installing floating shelves (not on load-bearing walls)
- Changing light fixtures (like-for-like replacement, same wiring)
- Installing new towel bars, toilet paper holders, etc.
- Replacing vinyl or tile flooring (without subfloor modifications)
- Installing new shower curtains or doors (on existing openings)
The gray area: If you’re removing old tile and discovering damaged substrate that needs waterproofing repair, you’re technically in permit territory, especially in Toronto, Mississauga, and Vaughan.
Minor Repairs and Maintenance
No permit needed for:
- Fixing minor leaks (not involving pipe replacement)
- Recaulking tubs and showers
- Regrouting tile
- Fixing drywall damage
- Touch-up painting
- Replacing worn wax rings on toilets
Rule of thumb: If you’re only repairing existing work to its original condition without changes, no permit is needed.
 When to Call and Double-Check
If you’re unsure, call your local building department. It’s a free phone call that could save you thousands. Here’s why:
- Requirements vary slightly between GTA municipalities
- Some cities are stricter than others on specific items
- Older homes may have different requirements than new construction
- Heritage properties have additional restrictions
Pro tip: Many building departments have helpful staff who will review your project description and tell you what you need. Use them!
The Complete Inspection Process: What Actually Happens
Once you obtain your permit, your renovation must pass several inspections. Skipping inspections or failing them is one of the costliest mistakes homeowners make. Here’s exactly what to expect:
Inspection #1: Plumbing Rough-In Inspection
When: After your plumber installs all new pipes, drains, and vents, but BEFORE anything is covered by drywall, flooring, or finishes.
What they’re checking:
- Drain line slopes (minimum 1/4″ per foot for waste, 1/8″ for vents)
- Vent sizing and routing (must connect properly to the main stack)
- Proper pipe materials and connections
- Adequate support and blocking
- Correct fixture spacing
- Air testing (pressure test to confirm no leaks)
- Cleanout accessibility
Critical timing issue: NEVER cover your plumbing before this inspection passes. If the inspector finds problems after you’ve closed walls, you’ll need to tear out your work.
Common failures:
*Improper vent distances (too far from the fixture)
*Insufficient drain slopes
*Missing cleanouts
*Incorrect pipe sizing
*Poor workmanship on connections
How to pass: Hire a licensed plumber who knows the Ontario Plumbing Code. DIY plumbing rarely passes on the first try.
Inspection #2: Electrical Inspection (ESA)
When: After electrical work is complete but before it’s concealed.
Who conducts it: Electrical Safety Authority (ESA), not your municipality. This is a separate process with its own fees.
What they’re checking:
- Proper GFCI protection on all bathroom receptacles
- Adequate clearances from water sources (minimum distances required)
- Correct wire sizing for loads
- Proper grounding and bonding
- Junction box accessibility
- Dedicated circuits were required (heated floors, jetted tubs)
- Proper vapor barriers around electrical boxes
- Compliance with Ontario Electrical Code
Common bathroom electrical work:
*Installing new outlets (required every 3 meters in renovations)
*Adding dedicated circuits for heated floors (typically 20A)
*Installing exhaust fan controls
*Upgrading panel capacity if needed
*Adding GFCI protection where it didn’t exist
Typical ESA fees: $100-$300, depending onthe scope of work
How to pass: Hire a licensed electrician (309A or 442A license). ESA inspectors are thorough and knowledgeable; attempting DIY electrical in bathrooms almost always fails inspection.
Inspection #3: Waterproofing Inspection (Critical in Toronto, Mississauga, Vaughan)
When: After the waterproof membrane is installed, but BEFORE tile or other finishes are applied.
Why it’s critical: Water infiltration is the #1 cause of bathroom failures. Municipalities have seen too many mold-riddled, rotted bathrooms to take this lightly.
What they’re checking:
- Proper membrane installation (typically Schluter, Wedi, Kerdi, or equivalent)
- Correct overlap at seams (minimum 2″ overlap, often 4″ required)
- Proper inside and outside corners (preformed or properly folded)
- Adequate coverage up walls (minimum 6′ in shower areas, often full height required)
- Proper integration with drain assemblies (critical failure point)
- Correct installation around penetrations (shower valves, tub spouts)
- Proper transitions to non-waterproofed areas
- Membrane continuity (no gaps or tears)
Toronto-specific requirements:
*Full waterproofing systems (not just RedGard paint-on)
*Specific approved membrane systems
*Detailed documentation and product spec sheets
*Sometimes requires the manufacturer’s installation certification
Common failures:
*Incomplete coverage at corners
*Poor integration with the drain
*Missing coverage around valve penetrations
*Insufficient wall height coverage
*Using non-approved products
*Improper seam overlap
How to pass: Hire experienced tile installers who work regularly in Toronto/GTA and understand local requirements. Provide product data sheets with your permit application.
Cost of failure: If you fail the waterproofing inspection after installing tile, you’ll demo everything and start over—$5,000-$15,000 lost.
Inspection #4: Framing Inspection (If Applicable)
When: If you’ve done structural work, after framing is complete but before drywall.
What they’re checking:
- Proper joist sizing and spacing
- Correct installation of joist hangers
- Adequate blocking and support
- Headers are properly sized for openings
- Bearing points are properly supported
- Compliance with the engineer’s drawings (if provided)
- No improper cuts or notches in structural members
When required: Any structural modifications removed walls, cutting joists, reinforced floors, etc.
Inspection #5: Insulation and Vapor Barrier Inspection
When: After insulation and vapor barriers are installed, before drywall.
What they’re checking:
- Proper R-value insulation
- Continuous vapor barriers
- Proper sealing around penetrations
- Adequate ventilation provisions
Often combined with: Framing inspection
Inspection #6: Final Inspection
When: After ALL work is 100% complete.
What they’re checking:
- Compliance with approved plans
- All fixtures are properly installed and operational
- All finishes complete
- Ventilation working properly
- No code violations
- All previous inspection conditions addressed
Required for final inspection:
*All work is completely finished
*All fixtures functioning
*All trim and finishes installed
*Site cleaned up
*All previous inspection corrections completed
Result: Permit closure. This is your proof that work was done legally, and to code keep this forever.
Common Permit Rejection Issues: Learn from Others’ Expensive Mistakes
After reviewing hundreds of permit applications and speaking with GTA building officials, these are the most common reasons bathroom permit applications get rejected:
Issue #1: Improper or Missing Vent Design (30% of Rejections)
The problem: Drain venting is poorly understood, even by some contractors. Every fixture needs proper venting, but many applicants:
- Don’t show vents on drawings at all
- Show vents too far from fixtures (Ontario Code: max 5′ for toilets)
- Use undersized vent pipes
- Show improper connections to the main stack
- Rely on “air admittance valves” (AAVs/cheater vents) where not allowed
- Don’t account for wet venting rules
Real example: Applicant shows toilet 8 feet from nearest vent. Maximum allowed under Ontario Code: 5 feet. Application rejected.
The fix:
- Hire a licensed plumber to design venting
- Show complete vent routing on drawings
- Include vent sizes (typically 2″ minimum for toilet groups)
- Show proper connection to the main stack or exterior vent
- Understand wet venting rules (can save you money)
Toronto tip: Toronto building officials are particularly strict about venting. Have your plumber review your plans before submission.
Issue #2: Missing or Inadequate Waterproofing Details (25% of Rejections)
The problem: Applications don’t include enough waterproofing information.
What’s missing:
- No specification of the waterproofing system/product
- No details on installation height up walls (need minimum 6′)
- No details on drain integration
- No corner details
- No specifications for backer board (cement board vs. foam vs. other)
- No manufacturer’s installation instructions included
Real example: Application shows “waterproof membrane” with no other details. What product? How high up the walls? How is it integrated with the drain? Rejected.
The fix:
- Specify exact waterproofing system (Schluter-Kerdi, Wedi, etc.)
- Include product data sheets.
- Show height of waterproofing on wall sections (minimum 6′ in showers)
- Detail drain integration with section drawings
- Show corner details
- Includethe manufacturer’s installation specifications
Mississauga note: Mississauga has been requiring even more detailed waterproofing documentation than Toronto recently.
Issue #3: Drain Slopes Not Shown or Incorrect (20% of Rejections)
The problem: Drawings don’t show drain line slopes or show incorrect slopes.
Ontario Building Code requirements:
- Waste pipes: minimum 1/4″ per foot slope (2%)
- Vent pipes: minimum 1/8″ per foot slope
- Floor drains: adequate slope to prevent standing water
What officials need to see:
- Section views showing drain routing
- Slope calculations for longer runs
- Elevation changes are clearly marked
- Confirmation that minimum slopes are met
Real example: Linear drain installation shows a 15-foot drain run to stack with “slope to drain” notation. No calculations shown. What if there’s insufficient vertical drop available? Rejected—prove it works.
The fix:
- Include section drawings showing drain slopes
- Calculate: (distance in feet) × 0.25″ = required vertical drop
- Show elevation marks on drawings
- Confirm adequate vertical space exists
- Show floor slope to drains (typically 1/4″ per foot)
Issue #4: Incomplete or Unclear Drawings (15% of Rejections)
The problem: Drawings are sloppy, incomplete, or don’t clearly show what’s changing.
Common issues:
- No “existing” vs. “proposed” comparison
- Missing dimensions
- Unclear symbols or legends
- Fixtures not labeled
- Walls not clearly marked as load-bearing or not
- No indication of what’s being demolished
- Hand-drawn sketches that aren’t legible
The fix:
- Create professional CAD drawings or hire a draftsperson
- Show “Existing Conditions” and “Proposed Conditions” on separate sheets
- Dimension everything (fixture locations, room dimensions, clearances)
- Use standard architectural symbols
- Include a clear legend explaining symbols
- Label every fixture and element
- Show demolition plans separately from construction plans
Typical cost: Professional drawings from designer/draftsperson: $500-$1,500
Issue #5: Missing Required Documentation (10% of Rejections)
What’s often missing:
- Engineer’s letter/stamp for structural changes
- Manufacturer’s product specifications
- Proof of ownership
- Site survey (sometimes required)
- Heritage approval (for heritage properties)
- TRCA approval (for homes in ravine/conservation areas)
- Adjacent property notification (for some projects)
The fix: Check your municipality’s submission checklist before applying. Don’t assume—verify.
Issue #6: Non-Compliance with Setbacks or Clearances
The problem: Fixtures don’t meet minimum spacing requirements.
Ontario Code requirements:
- Minimum 15″ from toilet centerline to walls/obstacles
- Minimum 21″ clear space in front of toilets
- Proper clearances for doors (can’t hit fixtures)
- Adequate turning radius for accessibility (when required)
The fix: Double-check all clearances before finalizing your design.
Issue #7: Inadequate Load Calculations for Heavy Fixtures
The problem: Installing large soaking tubs or steam showers without proving the floor can handle the weight.
When required: Heavy fixtures (tubs over 500 lbs when full, multi-head showers, stone surrounds)
The fix: Engineer’s letter confirming adequate structural support, or showing floor reinforcement plans.
GTA Municipality-Specific Requirements: It’s Not One-Size-Fits-All
While all GTA municipalities follow the Ontario Building Code, each has unique quirks, processing times, and additional requirements:
Toronto
Known for:
- Most thorough plan review in GTA
- Strict waterproofing enforcement
- Longer processing times (4-8 weeks typical)
- Heritage considerations in many neighborhoods
- Detailed review of older homes
Specific requirements:
- Full waterproofing system documentation
- Detailed venting plans
- Sometimes requires pre-consultation meetings
- Heritage permits if in a designated area
Processing: Plan on 6-10 weeks for approval
Permit fees: $4.93/m² for interior renovations (approximately $350-$600 for a typical bathroom)
Tips:
- Front-load your homework, provide excessive detail.
- Use the e-permitting system for faster service
- Call the building department with questions before applying
- Consider a pre-application consultation for complex projects
Perfect! Now I have the legitimate information about Scarborough. Let me create a comprehensive section specifically for Scarborough:
Scarborough (Toronto District)
Known for:
- Part of the City of Toronto jurisdiction with a dedicated district office
- Diverse housing stock from 1950s bungalows to modern condos
- High volume of bathroom renovations in older homes
- Strict Toronto waterproofing enforcement applies
- Active building inspection program
- Strong enforcement of permit requirements
Specific requirements:
- Scarborough falls under the City of Toronto Building Department jurisdiction
- All Toronto requirements apply: full waterproofing system documentation, detailed venting plans, and Ontario Building Code compliance.
- Particularly important for older Scarborough homes: aging infrastructure often triggers additional upgrade requirements
- Heritage considerations in historic neighborhoods like Guildwood
- TRCA (Toronto Region Conservation Authority) approvalis required for properties near ravines, Highland Creek, Rouge River, or Scarborough Bluffs
Processing: 4-10 weeks typical (same as Toronto city-wide)
- Simple bathroom renovations: 4-6 weeks
- Moderate renovations with layout changes: 6-8 weeks
- Complex projects with structural work: 8-12 weeks
- Add 2-4 weeks if an engineer’s review is required (common in older Scarborough homes)
Permit fees: $4.93/m² for interior renovations (City of Toronto standard)
- Small bathroom (35-50 sq ft): $280-$380
- Medium bathroom (50-75 sq ft): $380-$520
- Large bathroom (75-100 sq ft): $520-$680
- Master ensuite (100-150 sq ft): $680-$950
Scarborough-specific considerations:
Housing stock challenges:
- Many 1950s-1970s homes with cast iron drain stacks
- Older homes often have galvanized or lead plumbing, requiring replacement
- Electrical panels in older Scarborough homes frequently need upgrading (60-100 amp service)
- Asbestos considerations in older tile and building materials
- Combined sewer systems in many neighborhoods
Neighborhood factors:
- The Bluffs: Premium area, higher-end finishes expected, may require TRCA approval for properties near escarpment
- Agincourt: Family-oriented, practical renovations, good contractor availability
- Malvern: Value-conscious area, budget-friendly approaches work well
- Guildwood: Historic neighborhood, some heritage considerations
- Birch Cliff: Older homes often need complete bathroom overhauls
- West Rouge/Rouge: Newer developments may have TRCA requirements near Rouge River
Common Scarborough permit issues:
- Older homes often trigger additional code upgrade requirements
- Venting can be complex in multi-level split-level homes (popular in Scarborough)
- Basement bathrooms require proper drainage solutions (ejector pumps)
- Waterproofing inspection is strictly enforced (same as all of Toronto)
Tips for Scarborough homeowners:
- Use the online portal at aca.toronto.ca for application submission and tracking
- Schedule inspections at least 48 hours in advance (24 hours sometimes available for simple inspections)
- In-person appointments available at Scarborough Civic Centre for zoning questions (by appointment only)
- Best time to reach inspectors: 8:30-9:30 AM Monday-Friday
- Approved plans must be on-site for every inspection
- Waterproofing inspection is mandatory before tile installation
- Expect a thorough review for older Scarborough homes (pre-1980s)
What makes Scarborough different:
- Dedicated district office provides localized service
- High volume of older home renovations means inspectors are familiar with common issues
- In many areas, neighbors may report unpermitted work
- Close-knit communities mean word spreads about contractors (good and bad)
- Diverse contractor base with competitive pricing
- Local designers and drafters understand Scarborough’s housing stock
Online services for Scarborough residents:
- Permit application
- Permit status tracking: Online through the ACA portal
- Inspection scheduling: Can be done online or by phone
- Building permit history search: Free online by address
- Payment: Credit card online, in-person, or by phone
Pro tip: Scarborough residents benefit from dedicated district service while accessing Toronto’s streamlined e-permitting system. Use the online portal for faster processing and real-time status updates. For complex older homes common in Scarborough, consider a pre-consultation meeting with building staff before finalizing plans.
Mississauga
Known for:
- Streamlined digital permit system
- Very strict waterproofing inspections
- Efficient processing (faster than Toronto)
- Proactive enforcement
Specific requirements:
- Detailed waterproofing specifications (getting stricter)
- Clear venting documentation
- Energy efficiency compliance for major renovations
Processing: 3-6 weeks typical
Permit fees: Similar to Toronto, approximately $300-$500 for bathroom renovations
Tips:
- Take advantage of the online portal for tracking
- Waterproofing inspection is non-negotiable—be prepared
- Building department staff are helpful—use them
Brampton
Known for:
- Modern digital permit system
- Growing building department
- Moderate processing times
Specific requirements:
- Standard Ontario Code compliance
- Increasing focus on water conservation
Processing: 4-6 weeks
Permit fees: $300-$550, typical range
Tips:
- The digital system is improving—use the online portal
- Pre-submission checklist available online
Vaughan
Known for:
- Detailed engineering review when structural work is involved
- Thorough inspection process
- Moderate to strict enforcement
Specific requirements:
- An engineer’s stamp is often required for structural changes
- Detailed waterproofing plans
- Sometimes, additional stormwater management for additions
Processing: 4-7 weeks
Permit fees: $350-$600 range
Tips:
- Budget extra for an engineer if doing structural work
- The building department is helpful with questions
Markham
Known for:
- Strict compliance expectations
- Professional service
- Heritage considerations in historic areas
Specific requirements:
- Detailed plans expected
- Heritage permits for older neighborhoods
Processing: 4-6 weeks
Permit fees: $300-$500 typical
**Richmond Hill
Known for:
- Growing municipality with expanding requirements
- Generally professional service
Processing: 4-6 weeks
Permit fees: Similar to Markham
Oakville
Known for:
- High standards
- Heritage considerations in Old Oakville
- Professional building department
Processing: 4-7 weeks
Burlington, Milton, Ajax, Pickering, Whitby, Oshawa
Generally follow similar patterns with 3-6 week processing times and $300-$600 permit costs.
Pro tip: Always check your specific municipality’s website for current requirements, as processes and fees change periodically.
Real Costs: What You’ll Actually Pay for Bathroom Permits in 2026
Let’s break down the actual, real-world costs you’ll face:
Municipal Building Permit Fees
GTA Range: $200-$800, depending on municipality and project scope
Calculation methods vary:
- Toronto: $4.93 per square meter of interior renovation
- Mississauga: Similar formula-based fees
- Others: Often based on project value or flat fees
Typical bathroom renovation (50-80 sq ft):
- Toronto: $350-$600
- Mississauga: $300-$550
- Brampton: $300-$500
- Vaughan: $350-$600
- Markham/Richmond Hill: $300-$500
Electrical Safety Authority (ESA) Permit
Cost: $100-$300
What it covers:
- Plan review
- Inspection(s)
- Certificate of inspection
Required for:
- Any new electrical work
- Circuit modifications
- Heated floor installations
- Panel upgrades
Tip: Licensed electricians often include ESA fees in their quotes
Professional Drawing/Design Fees
Draftsperson/Designer: $500-$1,500
What you get:
- Professional CAD drawings
- Code-compliant plans
- Multiple copies for submission
- Revisions if needed
When needed:
- Complex layouts
- Structural changes
- The municipality requires professional drawings
- You want first-time approval
Architect: $1,000-$3,000+
When needed:
- Significant structural changes
- Heritage properties
- High-end custom designs
- Complex projects
Engineer’s Letter/Stamp
Cost: $800-$2,000
When required:
- Structural modifications
- Load-bearing wall changes
- Heavy fixture installations (large tubs)
- Floor reinforcement
- Municipalities may require older homes
What it includes:
- Site assessment
- Calculations
- Stamped drawings
- Professional letter
Additional Potential Costs
TRCA (Toronto Region Conservation Authority) fees: $200-$500
- Only if the property is in a ravine/regulated area
- Separate approval process
Heritage permit fees: $500-$2,000+
- If the property is designated heritage
- Longer approval process
Expedited review fees: $200-$500
- Some municipalities offer faster processing
- Not always available
Total Real-World Permit Costs
Simple bathroom renovation (fixtures in the same locations, new finishes):
- Municipal permit: $300-$500
- ESA permit: $150-$250
- TOTAL: $450-$750
Moderate renovation (some plumbing moves, electrical work, waterproofing):
- Municipal permit: $400-$600
- ESA permit: $150-$300
- Professional drawings: $800-$1,200
- TOTAL: $1,350-$2,100
Complex renovation (layout change, structural work, full gut):
- Municipal permit: $500-$800
- ESA permit: $200-$300
- Professional drawings: $1,000-$1,800
- Engineer’s letter: $800-$2,000
- TOTAL: $2,500-$4,900
Heritage property or conservation area:
- Add $500-$2,500 in additional fees
The Real Cost of NOT Getting Permits
Let’s compare:
Scenario 1: Do it right with permits
- Permit costs: $1,500-$2,500
- Peace of mind: Priceless
- Insurance valid: ✓
- Easy home sale: ✓
Scenario 2: Skip permits
- Save upfront: $1,500-$2,500
- IF caught or discovered:
- Fines: $5,000-$25,000
- Demolition orders: possible
- Buyer price reduction: $15,000-$30,000
- Insurance claim denial: $10,000-$50,000
- Redo work properly: $15,000-$40,000
- Legal fees: $2,000-$10,000
Simple math: You’re risking $30,000-$100,000 to save $2,000.
Step-by-Step: How to Actually Get Your Bathroom Permit
Here’s the complete process for getting your permit approved:
Step 1: Design Your Renovation (2-4 weeks)
What to do:
- Finalize your bathroom layout
- Select fixtures and materials
- Determine structural, plumbing, and electrical needs
- Measure everything carefully
Tools that help:
- Bathroom design software (free online options)
- Graph paper and pencil
- Contractor consultations
- Showroom visits
Step 2: Determine What Permits You Need
Check if you need:
- Building permit (from municipality)
- Electrical permit (from ESA)
- Plumbing permit (included in building permit)
- Heritage approval (if designated property)
- TRCA approval (if in a regulated area)
How to check:
- Call your municipal building department
- Use online permit requirement tools
- Consult with the contractor
- Review municipal websites
Step 3: Create Detailed Plans (1-3 weeks if hiring a professional)
Required drawings typically include:
1.Site Plan:
- -Property boundaries
- -Building location
- -Street access
2.Floor Plans:
- -Existing conditions
- -Proposed conditions
- -Demolition plan (if applicable)
- -Dimensions and measurements
- -Fixture locations
3.Plumbing Plans:
- -Water supply lines (hot and cold)
- -Drain lines with slopes indicated
- -Vent routing and sizing
- -Fixture rough-in heights
- -Connection points
4.Electrical Plans:
- -Receptacle locations (with GFCI notation)
- -Light fixture locations
- -Switch locations
- -Circuit information
- -Panel modifications (if any)
5.Section Drawings:
- -Wall sections showing waterproofing
- -Floor sections showing drain slopes
- -Detailed areas (corners, penetrations)
6.Elevation Drawings:
- -Wall elevations showing tile heights
- -Fixture mounting heights
- -Finish materials
7.Details:
- -Waterproofing details
- -Corner details
- -Drain integration details
- -Structural connection details (if applicable)
Software options:
- AutoCAD (professional)
- SketchUp (easier, free version available)
- Sweet Home 3D (free)
- Chief Architect (professional)
Or hire a professional: $500-$1,500 for a complete drawing set
Step 4: Gather Supporting Documents
Standard requirements:
- Completed permit application form
- Detailed drawings (see above)
- Proof of ownership (property tax bill or land registry document)
- Survey (sometimes required)
Project-specific requirements:
- Engineer’s letter/stamp (structural work)
- Manufacturer’s specifications (fixtures, waterproofing systems)
- Product data sheets
- Truss manufacturer’s letter (if applicable)
- Energy compliance forms (major renovations)
Special property requirements:
- Heritage approval (designated properties)
- TRCA clearance (conservation areas)
- Committee of Adjustment variance (if required)
Step 5: Submit Your Application
Three submission methods:
- Online (Preferred):
GTA municipalities that have online portals
Benefits:
- Faster processing
- Track status online
- Upload documents easily
- Communicate with reviewers
In Person:
- Visit the municipal building department
- Submit a paper application with drawings
- Pay fees at the counter
- Get receipt
Benefits:
- Ask questions directly
- Immediate confirmation
- Speak with the staff
By Mail:
- Send the application package
- Include payment (usually a check)
- Wait for confirmation
Not recommended: Slowest method, no immediate feedback
Step 6: Plan Review (2-8 weeks, depending on municipality)
What happens:
- Building officials review your plans
- Check compliance withthe Ontario Building Code
- Verify municipal bylaw compliance
- Review zoning conformity
- Assess structural adequacy
- Review mechanical/plumbing/electrical systems
Possible outcomes:
- Approved: Pay final fees, receive permit. You’re good to go.
- Conditional Approval: Minor issues noted, address before starting work.
- Corrections Required: More significant issues must rbe revisedand resubmitted.
- Rejected: Major problems, need substantial redesign.
Common correction requests:
- Add missing dimensions
- Clarify construction details
- Provide additional product information
- Revise to meet code requirements
- Add missing elements to drawings
How to respond:
- Make requested corrections promptly
- Resubmit within the timeframe given
- Include a cover letter explaining changes
- Highlight changes on drawings
Typical revision timeline: 1-3 weeks for review of corrections
Step 7: Receive Permit and Pay Final Fees
Once approved:
- Pay any outstanding permit fees
- Receive the official permit document
- Get inspection request information
- Receive a copy of approved plans (stamped)
Important:
- POST PERMIT AT PROPERTY:
- -Ontario law requires the permit to be visible from the street
- -Keep approved plans on site at all times
- -Have the permit number handy for inspection requests
Step 8: Begin Construction
Before starting:
- Ensure the permit is posted visibly
- Have approved plans on site
- Know the inspection schedule
- Contractor has a permit number
During construction:
- Follow approved plans (any changes may require permit revision)
- Keep the site reasonably clean and safe
- Respect neighbors
- Call for inspections at proper times
Step 9: Schedule and Pass Inspections
Critical rules:
- Call BEFORE covering work:
- -Plumbing rough-in: BEFORE covering pipes
- -Electrical: BEFORE covering wiring
- -Waterproofing: BEFORE installing tile
- -Framing: BEFORE installing drywall
- Give adequate notice:
- -Most municipalities require 24-48 hours’ notice
- -Some offer next-day or same-day inspection (call early morning)
- Be present or hava e representative present:
- -You or the contractor should be on-site
- -Have approved plans available
- -Be prepared to answer questions
What if you fail inspection:
- -The inspector will provide a written deficiency report
- -Correct all noted deficiencies
- -Call for re-inspection
- -Pass before proceeding
Re-inspection fees: Some municipalities charge $100-$200 for failed inspections requiring re-inspection
Step 10: Final Inspection and Permit Closure
When to call:
- Only after 100% complete:
- -All fixtures installed and functioning
- -All finishes complete
- -All previous corrections addressed
- -Site cleaned
What inspector checks:
- -Compliance with approved plans
- -All work was completed properly
- -No code violations
- -All previous inspection conditions met
After passing:
- -Receive final approval
- -Permit officially closed
- -Keep documentation forever (seriously, forever)
Why keep records:
- -Proof for future buyers
- -Insurance claims
- -Future renovation permits
- -Property value documentation
Working with Contractors: Protecting Yourself Through the Permit Process
Choosing the right contractor can make or break your permit experience.
Red Flags That Should Send You Running
 “Permits aren’t necessary for this project” when they clearly are
“We can save money by skipping permits.”
“I’ll get the permit later” or “We’ll get the l get the permit after.”
“Nobody gets permits for bathroom.”
“The inspector won’t find out.”
“I know a guy who can pass anything.”
Offer seems too good to be true (20-30% below other quotes)
Pushes you to start immediately without permits
No license number or insurance
Can’t provide references
Green Flags (What Good Contractors Do)
Proactively discusses permits and includes them in the quote
Has a process for pulling permits (either themselves or helps you)
Provides a detailed written quote, including permit costs
Licensed and insured (ask for proof)
Provides references from recent similar projects
Explainthe s inspection process and schedule them properly
Follows approved plans and documents any needed changes
Calls for inspections at appropriate times
Communicates throughout the project
Stands behind their work with a warranty
Questions to Ask Every Contractor
About permits:
- “Do we need permits for this project?”
- “Who will pull the permits, you or me?”
- “Are permit costs included in your quote?”
- “How long will permit approval take?”
- “What happens if permits are denied or require corrections?”
About experience:
- “How many similar bathroom renovations have you completed in [your municipality]?”
- “Can you provide references I can contact?”
- “What’s your experience with [specific requirement like waterproofing]?”
About inspections:
- “How do you handle the inspection process?”
- “What’s your pass rate on first inspections?”
- “What happens if we fail an inspection?”
About licenses and insurance:
- “Are you licensed?” (Request license numbers)
- “Do you carry liability insurance?” (Request certificate)
- “Are your workers covered by WSIB?” (Important in Ontario)
About the work:
- “Will you be doing the work personally or subcontracting?”
- “Who specifically will handle plumbing/electrical/tile work?”
- “Are your subtrades licensed?”
Contract Must-Haves
Your written contract should specify:
- Permit responsibility:
- -Who applies for permits
- -Who pays permit fees
- -What happens if the permits are denied
- -Timeline for permit approval
- Scope of work:
- -Detailed description of all work
- -Materials specified
- -Finishes specified
- -What’s included/excluded
- Payment schedule:
- -Never pay 100% upfront
- -Typical: 10% deposit, 40% at rough-in, 40% at substantial completion, 10% after final inspection
- -Payment tied to milestones, including passed inspections
- Timeline:
- -Start date
- -Substantial completion date
- -Final completion date
- -Consequences for delays
- Inspection coordination:
- -Who schedules inspections
- -Who must be present
- -What happens if inspections fail
- Change orders:
- -Process for changes to scope
- -How changes affect price and timeline
- -Must be in writing
- Warranty:
- -Length of warranty
- -What’s covered
- -Process for warranty claims
- Cleanup:
- -Daily cleanup expectations
- -Final cleanup requirements
- -Debris removal responsibility
DIY vs. Hiring a Contractor
Consider DIY if:
- You have relevant skills and experience
- You have time to manage permits and inspections
- You’re comfortable with building codes
- You can hire licensed tradespeople for specialized work (plumbing, electrical)
- The project is relatively simple
Hire a contractor if:
- You lack specific skills (especially plumbing/electrical)
- You don’t have time to manage the project
- The project is complex or involves structural work
- You want warranty protection
- You want one point of accountability
Hybrid approach:
- You can act as your own general contractor
- Hire la icensed plumber for plumbing rough-in and inspection
- Hire a licensed electrician for electrical work and inspection
- Do demolition, drywall, tile, and painting yourself
- You pull permits as a homeowner
- Often saves 20-30% vs. full-service contractor
What Actually Happens If You Skip Permits (The Ugly Truth)
Let’s talk about the real consequences of unpermitted work:
Scenario 1: Discovery During Home Sale (Most Common)
What happens:
- You list your home for sale
- Buyer’s home inspector notices bathroom renovation
- The inspector asks for permit documentation
- You can’t provide it
Then,
Best case:
- Buyer demands a price reduction equal to 50-100% of the renovation cost
- You lose $15,000-$30,000 in the sale price
- Deal still closes, but you’re out of substantial money
Worst case:
- The buyer walks away completely
- You must disclose to future buyers (Ontario law)
- Home sits on the market longer
- Eventually, sell at a reduced price anyway
- Or forced to tear out work, get proper permits, and rebuild ($25,000-$50,000+)
Real example: $28,000 bathroom renovation, no permits. Buyer discovers during inspection. Demands a $20,000 price reduction. The seller has no choice but to accept or risk the deal falling through.
Scenario 2: Insurance Claim Denial
What happens:
- Water damage from failed waterproofing in an unpermitted bathroom
- You filean insurance claim for $25,000 in damages
- An insurance adjuster investigates
- Discovers renovation was unpermitted
- Claim denied
You’re personally liable for:
- -All water damage repair: $10,000-$30,000
- -Mold remediation: $5,000-$15,000
- -Structural repairs: $5,000-$20,000
- -Rebuilding bathroom properly with permits: $15,000-$40,000
- -Total out-of-pocket: $35,000-$105,000
Real example: Homeowner had an unpermitted bathroom renovation. Waterproofing failed, and water leaked into the main floor, causing extensive damage. Insurance denied a $47,000 claim due to unpermitted work. The homeowner paid everything out of pocket.
Scenario 3: Neighbor Complaint
What happens:
- Neighbor sees renovation work happening
- No permit posted
- Calls municipal bylaw enforcement
- The inspector visits the property
- Issues stop-work order
Then:
- All work must stop immediately
- You’re ordered to apply for permits
- Must expose completed work for inspection
- Pay fines: $500-$5,000+
- If work doesn’t meet code, must demolish and redo
- Total cost: Original work + fines + permits + corrections + delays = $10,000-$40,000 extra
Scenario 4: Random Municipal Inspection
What happens:
- -Building inspectors have the right to enter properties
- -Can inspect based on complaints, random checks, or other reasons
- -If they discover unpermitted work:
Consequences:
- -Stop-work order
- -Compliance in order to obtain permits retroactively
- -Orders to expose work for inspection
- -Orders to demolish non-compliant work
- -Fines: $500-$50,000 (individuals), $100,000+ (corporations)
- -Criminal charges possible for serious violations
Scenario 5: Property Assessment Increase Without Value Realization
What happens:
- -MPAC (Municipal Property Assessment Corporation) notices improvements
- -Increases property assessment
- -You pay higher property taxes
- -BUT can’t realize value when selling due to permit issues
- -You’re paying more tax on the value you can’t capture
The Long-Term Reputation Damage
If you’re a contractor:
- -Word spreads in the community
- -Online reviews mention unpermitted work
- -Licensing board complaints
- -Difficulty getting insurance
- -Potential loss of contractor license
If you’re a homeowner:
- -Difficulty obtaining future permits
- -Increased scrutiny on property
- -Potential issues with mortgage refinancing
- -Problems with home equity lines of credit
The Legal Exposure
Criminal charges possible for:
- -Willful disregard of the Building Code Act
- -Fraud (if knowingly selling a home with undisclosed unpermitted work)
- -Violations causing injury or death
Civil liability:
- -Buyers can sue after closing
- -Liable for correction costs
- -Liable for consequential damages
- -Legal fees: $5,000-$25,000+
The Math Is Simple
Cost to do it right:
- -Permits: $1,500-$3,000
- -Proper inspections: $0 (included)
- -Peace of mind: Priceless
Cost if caught:
- -Minimum: $15,000-$25,000
- -Average: $30,000-$60,000
- -Worst case: $75,000-$150,000+
You’re risking 10-50x what permits cost
Red Flags and Warning Signs: Protect Yourself
Red Flags in Contractor Quotes
Quote is 30%+ below others without explanation
“Permits included” but no specific amount shown
Vague scope of work without specifics
Payment structure demands a large upfront payment (50%+)
No mention of inspections or permitting process
Timeline seems unrealistic (complete bathroom in 3-5 days)
No written contract or “handshake deal.”
Red Flags During Work
No permit posted at the property
Workers can’t answer basic questions about what they’re doing
Work deviates from plans without discussion
Contractor rushes to cover work before inspection
Contractor discourages you from being on site
Shortcuts being taken (wrong materials, poor workmanship)
Subcontractors not licensed or insured
Red Flags About Permits
“Inspector won’t check that.”
“Everyone does it this way” when it’s clearly wrong
“We’ll fix it if the inspector complains.”
Scheduling inspections late or trying to skip them
Failing inspections repeatedly
Inspector notes serious concerns
What Good Looks Like
Permit posted prominently within days of starting work
Work follows approved plans closely
Licensed trades doing specialized work (plumbing, electrical)
Quality materials as specified
Clean, organized worksite
Proactive communication about progress and issues
Inspections scheduled appropriately and passed
Professional conduct throughout the project
Final Thoughts: The Smart Homeowner’s Approach
If you take away nothing else from this guide, remember these key points:
- Permits protect you, not punish you. They’re insurance against catastrophic failures, legal problems, and financial losses.
- The cost of permits is tiny compared to the cost of skipping them. You’re risking $30,000-$100,000 to save $2,000.
- Not every bathroom project needs a permit, but most substantial ones do. When in doubt, call your building department.
- Hire licensed trades for specialized work. Plumbers and electricians are licensed for good reasons.
- Good contractors embrace permits. If a contractor discourages permits, that’s your cue to find a different contractor.
- Keep all permit documentation forever. You’ll need it when selling, for insurance claims, and for future renovations.
- Each GTA municipality is slightly different. What works in Toronto might be different in Mississauga or Vaughan. Always check local requirements.
- Budget realistically for permits and inspections. They’re a normal part of renovation costs, typically 2-5% of your total budget.
- Follow the approved plans. If you need to make changes during construction, get them approved before proceeding.
- Be patient with the permit process. It takes time, but it’s time well spent protecting your investment.
Your bathroom renovation is a significant investment in your home and your quality of life. Do it right, do it safely, and do it with the proper permits. Your future self and your future buyers will thank you.
Good luck with your bathroom renovation! Do it right, and enjoy your beautiful new space for years to come.
This guide is for informational purposes only and should not be considered legal advice. Building codes, requirements, and processes change periodically. Always verify current requirements with your local building department before starting any renovation project.

Founder of ASM Constructions and Renovations with 10+ years of hands-on experience in residential and commercial projects across the Middle East and Canada. Based in Scarborough, he specializes in home renovations, basement finishing, and structural improvements across the GTA. Known for delivering reliable workmanship, transparent pricing, and client-focused project execution.


LEAVE A COMMENT